
Allow me to be a candid for a moment. When we’re selling displays, the most common reason why customers ‘decide to go in a different direction’ is because they’re intimidated by the graphic cost. We often hear,“I can get a [product name] from [some other guy] for way cheaper.”
Yes, and I can buy an apple for $1 cheaper than orange, but I’m not getting the same fruit.
The concern is that customers, especially those without a lot of trade show experience, don’t realize they’re comparing apples to oranges. If we sell a pop-up for X amount, and the other guy sells one for Y amount, the cost difference is often in the quality of the graphic. And graphic quality is a hard thing to explain.
I can tell you: a cheaper display graphic might be printed to laminated paper.
I can tell you: that our pop-up graphics are printed on a 7 mil white polyester film with a 3 mil scuff-and-scratch resistant face laminate and an 11 mil light-barrier back laminate.
But what the heck does that mean? And what difference will that make on your pop-up?
If you want to be sure you’re getting the best value for your dollar, and know that the display you buy will look great year after year, read on. I’m going to go over:
- Key terms to know when talking about graphic quality
- What to watch for when comparing different types of trade show displays
- How the production process can affect graphic quality
Still with me? Let’s start with those key terms to know when discussing graphic quality in the trade show industry.
Shadowing on pop-up display graphics.
Shadowing
The ambient light around your display will change from show to show. Shadowing is what happens when shadows (cast by the hardware or anything behind your display) are visible through your graphic panels from the front of your display. If your graphic panels don’t have a light barrier back laminate (or a light-blocking panel on a fabric graphic) you’ll see this effect. It detracts from the overall appearance of your booth, especially if those shadows fall over your logo or text, obscuring your message. Hold your graphic sample up to a light and place your hand between it and the light. If you can see your hand’s shadow, you’ll have shadowing problems with that material.
An example of tearing, which occurs easily with unlaminated paper graphics.
Ripping / Tearing
No matter how careful you are with your display, accidents can still happen. Ripping or tearing happens when your graphic material is not strong enough to withstand those accidents. Generally speaking, paper prints (even if laminated) fall into this category, but even stronger materials like polyester can rip or tear if they are not laminated, or if a weaker laminate is used. Try to rip your graphic sample in half like a piece of paper. Does it tear? If the answer is yes, don’t expect that material to hold up over time.
Delamination: the laminate pulling away from the printed graphic.
Delaminating
High quality trade show graphics (unless they’re fabric) are laminated. Delaminating is what happens when the laminate starts to peel away from the graphic, usually along the edge or seam. There are several reasons why this happens, the most common is that the print material and laminate are not perfectly compatible, or there’s a problem with the laminating process. As delaminating is often something that occurs over time, it’s hard to test with a graphic sample. Ask about your supplier’s laminating process, and whether or not they warranty against delaminating—we do.
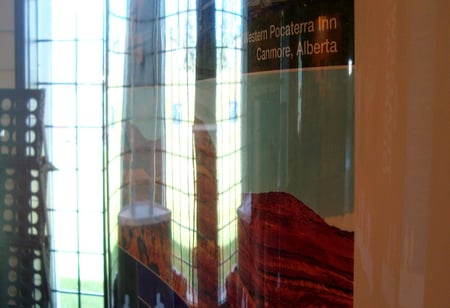
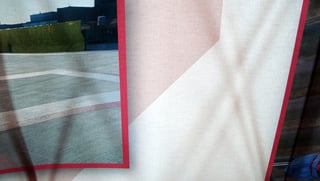
In this example of gloss, can you see the graphic, or just the reflection of the window?
Gloss
A shiny, glossy finish can look great on small print pieces like brochures and catalogues. That is not the case in a trade show environment. A glossy laminate on your graphics at a show means your overhead lights, or the ambient light in the exhibit hall, will reflect and obscure your graphics, making it difficult for visitors to clearly see your message. Stand with your back to a light and hold up your graphic sample. Twist it up and down, left and right. If you can’t always see the details of the print the laminate is probably too glossy.
Kink
This isn’t that kind of kink, this is what happens when your graphics are folded or bent and the resulting crimp in the material doesn’t smooth out, but leaves a sort of ridge behind. One kink in a graphic panel isn’t too bad. Add a few more, and in short order your graphics will look like they’ve been through the ringer. Not many materials that are flexible enough to roll up for transportation are also impervious to kinking, but a combination of high quality polyester film with a thin, strong face laminate reduces both the likelihood of kinking and the appearance of a kink after it’s been smoothed back out. Take your graphic sample and create a small fold, then smooth it back out with your fingers. If it was too easy to fold, crumpled badly, and the kink is still very visible after smoothing, shop for a better material—this one won’t last long on the trade show circuit.
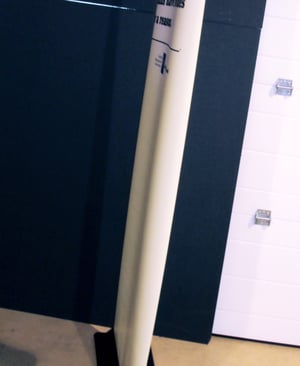
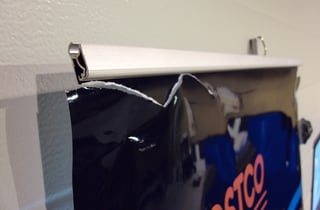
An example of curling, where the banner stand graphic is curling back towards the pole.
Curling
Not the sport, which can be fun with some buddies and a few beers. This curling is when the edge of a banner stand graphic curls in on itself instead of standing straight and flat. A really bad curl can make the banner stand appear almost rounded, and obscure the message and design. Curling happens when a banner stand sits rolled up for a while in its base or shipping bag, and when it’s unrolled for setup it doesn’t flatten back out. Every print material and laminate combination reacts to curling differently, and weather can factor in as well. However, a good print technician will have done their work to find the best combination to reduce the curling effect. Check out some photos of their past work. Are the edges of their banner stands curling?
Getting Down to Business
Now that you’ve pried all that graphic quality jargon from my brain, let’s cover how to use it when you’re looking at different types of trade show displays.
Shopping for a Pop-Up Display?
Watch for: Kink
Pop-up graphics are manually rolled up and attached to the pop-up frame, which leaves lots of room for accidents and mishandling—leading to kinking.
Watch for: Shadowing
The pop-up frame is usually open on the back, and is a complex network of aluminum tubes. Shadows from a pop-up frame look horrible on the front of the display.
Also watch for: Delaminating, Gloss
Shopping for a Banner Stand?
Watch for: Curling
Curling is unique to banner stands, where there is no support along the side of the banner. It can be especially prevalent in wider graphics. Look for ‘stay-flat’ materials.
Watch for: Ripping/Tearing
Cheapers banner stands are often printed to just paper (unlaminated) and the constant up and down makes it easy to rip or tear.
Also watch for: Shadowing, Gloss, Delaminating
Shopping for a Fabric Display?>
Watch for: Wrinkling
This is unique to fabric and pretty self explanatory. Tension fabrics stretch over the frame to reduce wrinkles, but only if the fit is correct. Look for a good, tight fit with tension fabrics, or for “wrinkle-resistant” non-tension fabrics.
Watch for: Shadowing
Different fabric displays use different materials, but if you’re worried about shadowing with the hardware then watch for fabrics that include a light-blocking panel—and extra bit of material that negates any shadowing.
Process vs Material: Equally Important!
When you’re comparing graphic quality, you’re not just comparing materials—you’re also comparing people. Who are the people behind the graphic production, and what is their print and production process like? Great materials can be ruined if they’re not properly handled during production.
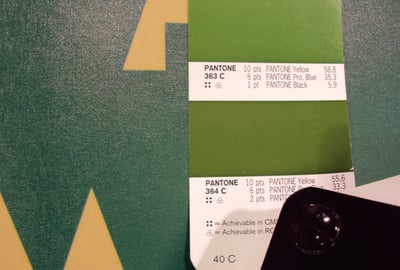
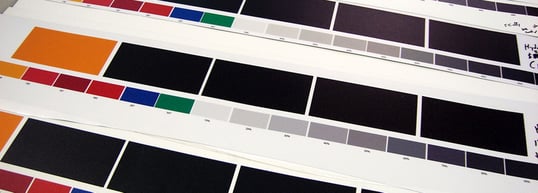
What happens when the printer does not match your Pantone colour? This.
Time
If it can be done quickly, it might not be done well. Our print process starts with a complete graphic file review, where our print technician sits down with your file and ensures that everything looks the best it can before it even hits the printer. This includes checking Pantone colours, colour correcting photos, checking image resolution, and finally running test prints to ensure what’s appearing on the screen is what’s on the printer. If there is no quality time spent reviewing your files, who knows what your completed display will look like!
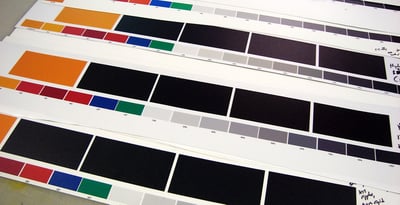
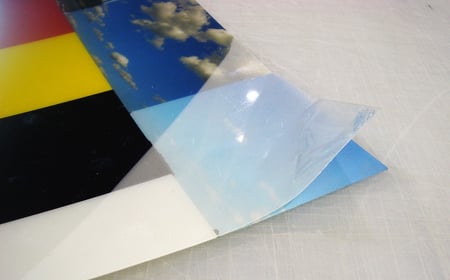
Comparing and testing print profiles across different material combinations.
Process
Find out what kind of research and development your printer has done to ensure that their print materials are compatible. Our print technician is constantly testing new materials on the market, experimenting with print and lamination combinations, and updating our digital print profiles to ensure our prints always look amazing. I know from experience that if the legwork isn’t done, the graphic quality will suffer.
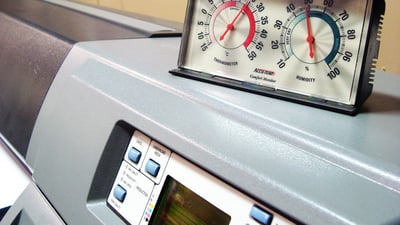
What does it take to achieve the right humidity? Gauges, humidifiers & dehumidifiers.
Knowledge
Did you know that the relative temperature and humidity in a print shop affects print quality? Or that if enough time doesn’t elapse before an inkjet print is laminated it can dull the graphic appearance? Your print technician should know that, and be able to answer any and all questions you have on their time, materials and print process.
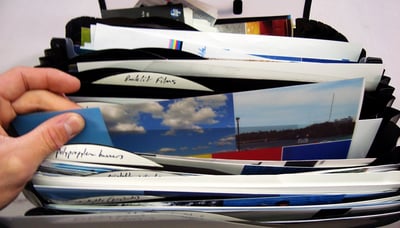
Years worth of graphic quality research and development.
Rinse & Repeat
When you need to add to your existing graphic set, it’s vitally important that your new prints are consistent with the old—in terms of colour, material, and tone. A good print technician ( like ours!) will have archived test prints and colour notes, and reference those when printing additional graphics. This is especially useful when suppliers change or discontinue materials, ensuring we can still achieve a very close match. Be sure to find out what kind of process your printer has in place for archiving completed work.
The Bottom Line
Your display graphics are big part of your trade show expense, and they should stand up to years of wear and tear. When you’re shopping for a trade show display or updating your graphics, take that wonderful knowledge you now have about printing terms and ask for material samples. Test the material. Be sure you’re getting the quality your display needs. And talk to the print technicians. Be sure they know what they’re doing, so you know your display will come out looking exactly the way you envisioned it.
I know our materials will stand up to the test. Check it out for yourself—order a free graphic sample package, and go forward knowing exactly when you’re comparing apples to apples and oranges to oranges!